Category Archives: cPanel

cPanel being one of the most popular and widely used control panel in hosting
We share few tips which we come across while working day in and day out.

[ERROR] Can’t init tc log Mariadb

2018-03-30 2:06:19 139671858284288 [Note] InnoDB: Dumping buffer pool(s) not yet started
2018-03-30 2:06:19 139672598403328 [Note] Plugin ‘FEEDBACK’ is disabled.
2018-03-30 2:06:19 139672598403328 [Note] Recovering after a crash using tc.log
2018-03-30 2:06:19 139672598403328 [ERROR] Can’t init tc log
2018-03-30 2:06:19 139672598403328 [ERROR] Aborting

Was getting above error in mysql errorlog

The solution to this issue was just to go ahead and delete tc.log

rm -rf /var/lib/mysql/tc.log

Went ahead and restart mysql.. Mysql was online

root@server lib]# rm -rf /var/lib/mysql/tc.log
[root@server lib]# /etc/init.d/mysql restart
MySQL server PID file could not be found! [FAILED]
Starting MySQL.180330 02:07:40 mysqld_safe Logging to ‘/var/lib/mysql/server.cpanel.com.err’.
180330 02:07:40 mysqld_safe Starting mysqld daemon with databases from /var/lib/mysql
[ OK ]
[root@server lib]#


umount: /backup: device is busy

While trying to unmount a secondary drive I see below error

umount: /backup: device is busy.

(In some cases useful info about processes that use
the device is found by lsof(8) or fuser(1))

The issue was due to the drive /dev/sdb being used by some process

Below is the process on how to find process using drive and kill it and umount drive

# Command to unmount drive

root@oM1050 [/backup/weekly]# umount /backup
umount: /backup: device is busy.
(In some cases useful info about processes that use
the device is found by lsof(8) or fuser(1))

#command to see disk listing and name on which its mounted

root@oM1050 [/backup/weekly]# df -h
Filesystem Size Used Avail Use% Mounted on
/dev/sda3 48G 20G 26G 44% /
tmpfs 16G 0 16G 0% /dev/shm
/dev/sda1 865G 537G 285G 66% /home
/dev/sdc1 118G 93G 19G 84% /var
/dev/sdb 688G 686G 0 100% /backup

#command to find the process number which is using the drive

root@oM1050 [/backup/weekly]# fuser -m /dev/sdb
/dev/sdb: 11676c 12801c

# checking which process is running on it

root@oM1050 [/backup/weekly]# ps auxw|grep 11676
root 11676 0.0 0.0 109644 3088 pts/1 Ss 07:23 0:00 -bash
root 19587 0.0 0.0 105372 892 pts/1 S+ 07:32 0:00 grep 11676

# checking which process is running on it
root@oM1050 [/backup/weekly]# ps auxw|grep 12801
root 12801 1.2 0.0 106756 4544 pts/1 D 07:24 0:06 rm -i -rf 2018-02-14
root 19843 0.0 0.0 105372 896 pts/1 S+ 07:33 0:00 grep 12801

# killing the process which is engaged in /dev/sdb

root@oM1050 [/backup/weekly]# kill -9 12801
root@ok1050 [/backup/weekly]#
[1]+ Killed rm -i -rf 2018-02-14

and finally drive unmounted

root@ok1050 [~]# umount /backup
root@ok1050 [~]#

The system could not create the user “triltch” because it conflicts with an unmanaged MySQL database user and an unmanaged PostgreSQL database user

While creating a new account in server was getting below error

The issue was due to mysql user already being present in server

root@srv1 [~]# /scripts/wwwacct trill.com tritch hood773ud
+===================================+
| New Account Info |
+===================================+
| Domain: trill.com
| UserName: tritch
| PassWord: hood773ud
+===================================+

This ok? yes
Checking input data……Done
Validating system setup……Done
…Done
Validating IP……Done
Validating Username……Done
Validating Contact Email……Done
Checking for database conflicts…(XID vh9sa4) The system could not create the user “tritch” because it conflicts with an unmanaged MySQL database user and an unmanaged PostgreSQL database user.

Steps to fix this issue

Login to WHM

Go to PHPmyadmin

Select database Mysql

Go to Option search
Select all tables inside  in option  Inside tables

In option Words or values to search for (wildcard: “%”):  put up name of mysql user which is conflicting >>

Delete all the tables you get in search tables and issue should be resolved

You can also refer in below URL

Solution: cPanel error “cannot create account because it conflicts with an unmanaged MySQL database user”


SMTP AUTH is required for message submission on port 587

The ‘SMTP AUTH’ error usually happens when users try to send mails without properly authenticating their mail account in email clients such as Outlook or Thunderbird.

What causes the error ‘SMTP AUTH is required for message submission on port 587’ in cPanel/WHM servers

With the latest cPanel/WHM update, email accounts that were working fine till now, may find their mails getting undelivered, showing this error message in the Exim log:

2018-01-17 05:57:40 H=(cruxserver12.com) [174.136.14.87]:63927 F=<zimphost@gmail.com> rejected RCPT <technical424@gmail.com>: SMTP AUTH is required for message submission on port 587
2018-01-17 05:58:09 H=(cruxserver12.com) [174.136.14.87]:63932 F=<zimphost@gmail.com> rejected RCPT <technical424@gmail.com>: SMTP AUTH is required for message submission on port 587

This has happened due to a latest security feature implemented in cPanel/WHM – ‘SMTP AUTH’ requires SSL by default.

To combat spamming in servers and to provide secure email transmission, email clients that try to send mails without using secure transmission will be denied mail delivery through the server.

The option that determines this is ‘Require clients to connect with SSL or issue the STARTTLS command before they are allowed to authenticate with the server’, which is set to ‘On’ by default, in WHM -> Exim Configuration Editor.

Setting it to Off will fix this issue  🙂


Your system has run out of available ip addresses, or you do not have permission to use any more ip addresses WHMCS

While activating a new account I could see an error

Your system has run out of available ip addresses, or you do not have permission to use any more ip addresses

The issue was due to the server running out of spare dedicated IP address

The issue can be resolved in 2 ways

1) Adding additional IP address in server

2) By editing file  /var/cpanel/packages/abckhosting which is a package file which is assigned to customers.

SSH to server in question on which account is activated  and  edit the package file as mentioned

vi /var/cpanel/packages/abckhosting

The parameter IP=y needs to be changed to  IP=n to get account activated without adding new  IP address.

BWLIMIT=unlimited
CGI=y
CPMOD=paper_lantern
DIGESTAUTH=n
FEATURELIST=default
HASSHELL=n
IP=n
LANG=en
MAXADDON=5
MAXFTP=5
MAXLST=unlimited
MAXPARK=5
MAXPOP=unlimited
MAXSQL=10
MAXSUB=5
MAX_DEFER_FAIL_PERCENTAGE=unlimited
MAX_EMAIL_PER_HOUR=unlimited
QUOTA=100000
_PACKAGE_EXTENSIONS=


This did help in creating new account without adding additional IP address


How to fix invalid cPanel license error when the IP is in fact licensed


Was getting below error on cpanel server  even when cpanel license was assigned for main server IP address

root@server4 [/etc/sysconfig/network-scripts]# /usr/local/cpanel/cpkeyclt
Updating cPanel license…Done. Update Failed!
Error message:
The cPanel license server said that there was no license for your IP address.
For more information visit: http://www.cpanel.net/lic.html

The exact message was: Abort, Retry, Fail?

Building global cache for cpanel…Done


The issue was due to wrong entries in  /etc/hosts file

went ahead and set the correct hostname and IP in  /etc/hots file and  refreshed cpanel license

root@server4 [/etc/sysconfig/network-scripts]# /usr/local/cpanel/cpkeyclt
Updating cPanel license…Done. Update succeeded.
Building global cache for cpanel…Done
root@server4 [/etc/sysconfig/network-scripts]#


Ffmpeg on Centos 7 and Centos 6

Login to server via SSH

Below steps are for Centos 7

yum -y install epel-release

rpm –import http://li.nux.ro/download/nux/RPM-GPG-KEY-nux.ro

rpm -Uvh  http://li.nux.ro/download/nux/dextop/el7/x86_64/nux-dextop-release0-5.el7.nux.noarch.rpm

yum -y install ffmpeg ffmpeg-devel


Below steps are for Centos 6

yum -y install epel-release

rpm –import http://li.nux.ro/download/nux/RPM-GPG-KEY-nux.ro

wget https://li.nux.ro/download/nux/dextop/el6/x86_64/nux-dextop-release-0-1.el6.nux.noarch.rpm

rpm ivh  nux-dextop-release-0-1.el6.nux.noarch.rpm

yum -y install ffmpeg ffmpeg-devel


now we need to install ffmpeg-php to get it working using PHP

yum -y install git
git clone https://github.com/tony2001/ffmpeg-php.git

cd ffmpeg-php
/usr/local/cpanel/3rdparty/php/56/bin/phpize
/opt/cpanel/ea-php56/root/usr/bin/phpize
./configure –with-php-config=/opt/cpanel/ea-php56/root/usr/bin/php-config

If you want to install on PHP 7 use

/opt/cpanel/ea-php7/root/usr/bin/phpize


[Usually before easyapache 4 only phpize would work] now as there are multiple version of PHP there is need to  phpize from above path.

The path would changes based on php version

if you are using PHP 7 path will be /opt/cpanel/ea-php70/root/usr/bin/phpize and

/opt/cpanel/ea-php70/root/usr/bin/php-config

You can find path using find command

[root@server ffmpeg-php]# find / -iname phpize
/opt/cpanel/ea-php55/root/usr/bin/phpize

/opt/cpanel/ea-php56/root/usr/bin/phpize

/opt/cpanel/ea-php70/root/usr/bin/phpize


Do not use path ./usr/local/cpanel/3rdparty/bin/phpize


Before compiling ffmpegphp

need to make sure all need files are in   /usr/include

When you install ffmpeg and ffmpeg-devel files get stored in  /usr/include/ffmpeg however ffmpeg while compiling looks for files in /usr/include/ so need to copy files to /usr/include using below command

scp -r /usr/include/ffmpeg/* /usr/include/

Now you can go ahead and compile

./configure –with-php-config=/opt/cpanel/ea-php56/root/usr/bin/php-config

Note [Path /opt/cpanel/ea-php56/root/usr/bin/php-config will changed on which version you are installing ffmpeg]

[root@server ffmpeg-php]# find / -iname php-config

/opt/cpanel/ea-php55/root/usr/bin/php-config
/opt/cpanel/ea-php56/root/usr/bin/php-config
/opt/cpanel/ea-php70/root/usr/bin/php-config


now before making make and make install few things need to be modified.

mv /usr/include/libavutil/time.h /usr/include/libavutil/time.h_

now go ahead with make and make install

now   again need to rename the above file

mv  /usr/include/libavutil/time.h_    /usr/include/libavutil/time.h


ffmpeg modules will be installed in below path

root@server ffmpeg-php]# ls -al /opt/cpanel/ea-php56/root/usr/lib64/php/modules/
total 2712
drwxr-xr-x 2 root root 4096 Dec 7 07:07 .
drwxr-xr-x 4 root root 4096 Feb 22 2017 ..
-rwxr-xr-x 1 root root 32608 Feb 22 2017 bcmath.so
-rwxr-xr-x 1 root root 33792 Feb 22 2017 calendar.so
-rwxr-xr-x 1 root root 15584 Feb 22 2017 ctype.so
-rwxr-xr-x 1 root root 86928 Feb 22 2017 curl.so
-rwxr-xr-x 1 root root 180728 Feb 22 2017 dom.so
-rwxr-xr-x 1 root root 281640 Dec 7 07:07 ffmpeg.so
-rwxr-xr-x 1 root root 57792 Feb 22 2017 ftp.so


Now go ahead and add extension=ffmpeg.so to php.ini for the PHP version you need and restart apache

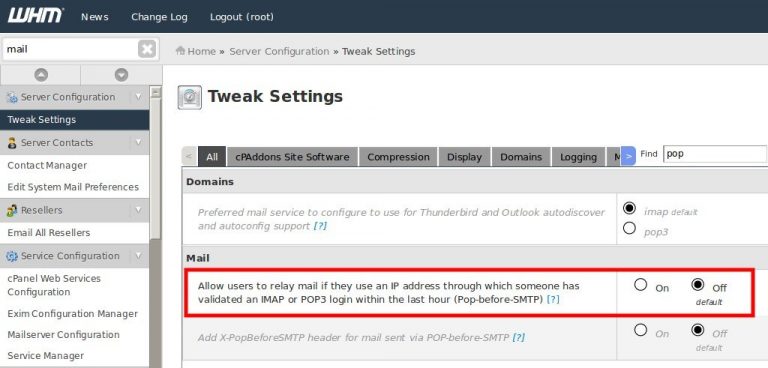


IPAddress is already an active IP

While trying to change main IP of server was facing issue

Where was getting message IPAddress is already an active IP

On checking around found the below solution which worked


Make sure that the IP address you’re trying to add has been removed from these files:

/etc/hosts
/etc/ips
/etc/mail_reverse_dns

If you happen to also be trying to add back the IP that was previous the primary IP address, you will also need to update this file:

/var/cpanel/mainip

Now could add the IP address back in server

Disable WordPress plugins from PHPmyadmin

You can easily disable all WordPress plugins directly from your database. This is useful when you have problems with your WordPress installation, such as not being able to log in to the admin Dashboard, or having blank pages on the website.

If you don’t know which is the database used by your WordPress website, you can check the DB_NAME variable in the WordPress configuration file – wp-config.php. This file is usually located in the document root directory of your application and can be opened via the File Manager in cPanel.

To disable all plugins, go to phpMyAdmin in cPanel and select your WordPress database from the menu on the left.

Browse the table wp_options and find the option active_plugins. Click the pencil icon to edit the table. Its content will vary, depending on what plugins you have enabled. For example, if you have the Akismet and Hello Dolly plugins enabled, the code there will be:

To disable all plugins, simply delete the code and click the Go button to save the change.

Please note that this table may have a different prefix instead of wp_. You will see the correct prefix of the database once you access the phpMyAdmin tool and select the the WordPress database.

Disabling the plugins in this way will not delete them from your WordPress application. They will simply be deactivated. You can easily activate them from your WordPress admin area at any time.